Your very own quick, cheap and easy Brine Shrimp Hatchery!
Share
Hello! Today I'm going to walk you through how to make your very own brine shrimp hatchery. This literally takes 10 minutes once you have all the parts!
If you'd rather watch it in video form, we have that here
First off, lets list off what you're gonna need per hatchery, for this tutorial we're gonna walk you through how to make 2, so you can harvest on alternate days for optimum yields.
- a CO2 screwcap - £5.99 here
- 2 control valves - £1.99 here
- an air pump (typically need one outlet per hatchery or a powerful air compressor)
- some airline - 2m for £2.49 here
- 1L bottle around 8cm wide - we got ours for 80p in Asda
- A growing tray which has holes 8cm wide (just short of the width of the 1L bottle)! (save the pots that come with it) - Any local garden centre, we got an 18 pot tray for £6
- Brine shrimp + salt mix - £4.89 here
You can get a bundle with 1, 2, 4 & 7 as one - £9.99 here
So now you have everything gathered together, lets start with the growing tray. Now because ours was so big, we've cut ours in half, so instead of 3 rows of 6, we've turned it into 3 rows of 3, like so

Now the middle row is what we're going to use for our two hatcheries, you can use up to five hatcheries using this configuration but it may become a bit congested and hard to manage!
Now we're going to cut out the bottom of each of pots in the middle row like so and try not to forget like I did and cut out the bottom right one 🤦

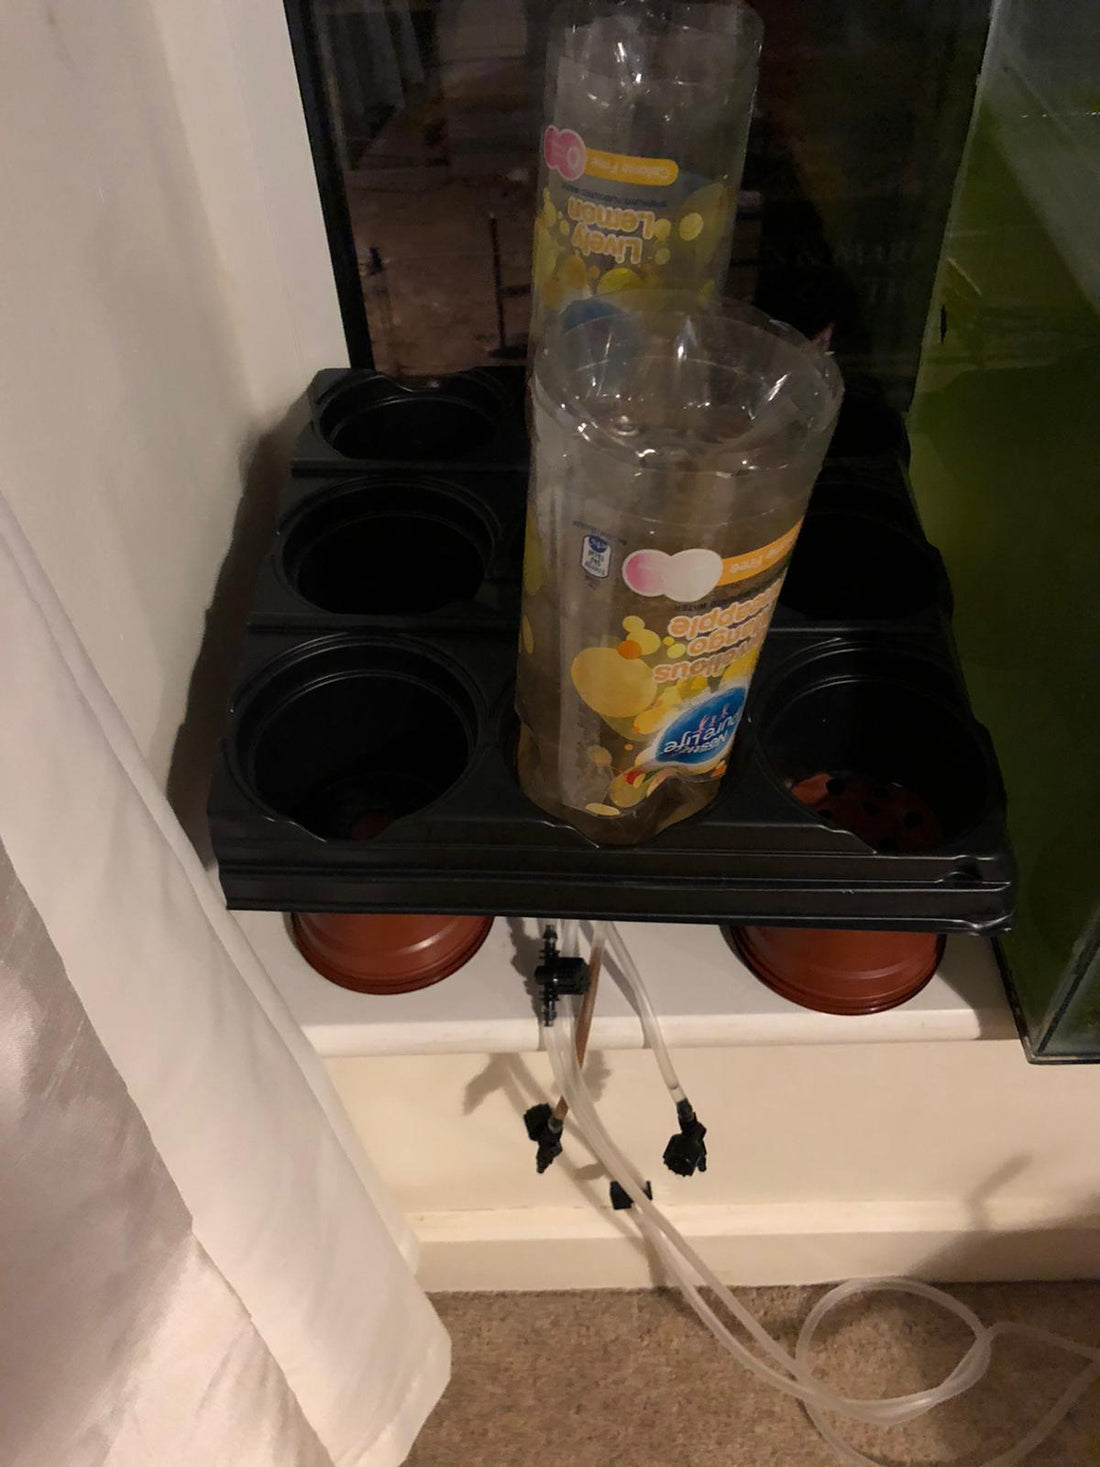
Now remember those pots that came with the grow tray that I told you not to throw away, we're going to use those as little feet! Grab four of them and cut out just the bottoms, we're then gonna slide them over the bottom of the four corners, just as below

There we go! A nice solid base to work off of, time for the fun stuff. Now, grab your 1 litre bottle throw away the screw top and empty out its contents (or drink it!) and slice the bottom off, be sure not to throw away the bit you cut off though, we'll use that later.

Now that we've done that, get our CO2 cap, take the little locks off and screw that on the end

Now, with the airline tube, we're going to cut it into 3 pieces per hatchery (jump forward to towards the end to get an idea of how long each piece should be). One piece that'll take us from the air pump to a control value, another to take us from that same control valve to the CO2 cap with the final piece going from the other side of the CO2 cap to another control valve. Like below

The control valve with the airline on both ends is our air valve, this is what goes into the air pump. The other one is our brine shrimp harvest valve.
Now, hopefully you're still with me here, we're almost there! If you haven't done so already, hook up your airlines to the CO2 screwcap and lock them shut. Now the moment of truth, slide the airline tube and bottle through the growing tray, and hopefully you should end up with something like the below!

All that's left to do is hook up the airline tube to the air pump, this should be the longest line. Make sure both the air line valve and the harvest line valve are both closed! Once you've hooked it all up, make sure you open the air line valve and you should hear air going through the bottle. Make sure your CO2 cap isn't getting squished like this

If it is, not to worry, we've still got plenty of growing pots, pop another one under the current ones (Don't cut them this time!)

Thats it! You're hatchery is all setup and running, obviously if you want 2 then go ahead and do the same thing for the second hatchery. Once you're ready put about 600ml of water into the hatchery, put 2 teaspoons of your brine shrimp + salt mix in, and then that bottom bit of the bottle you cut off, put that back on top, it'll help keep the heat in (which brine shrimp love!) and also make sure its not splashing all over the place. All going well, 24-48 hours later (we always leave it 48 hours), you should be able to harvest lots of little brine shrimp which you can use as a good nutritional meal for all of your fish.

How to harvest
Once 24-48 hours have passed, harvesting is easy. All you have to do is close the valve from the air pump, wait about 5 minutes for all the eggs to float up to the top, then open up the other harvest valve (make sure you have a container ready!) and all the brine shrimp will come flowing out. Just make sure you close it again before all the eggs come through! All thats left to do is to clean the bottles, refill and go again! Like we said above, we like to have 2 running to alternate days ie we start one hatchery up, then 24 hours later, we start up the other one. This ensures we have a continuous food source for our fish.
